
No recent searches
Popular Articles

Sorry! nothing found for
SceneForge Basics --> Timeline
Modified on Fri, May 10, 2024 at 3:58 PM
Timeline

Judah Mantell
Last Update a year ago
The timeline panel, which can be seen in the Stage and Shoot modes, is what allows you to animate basic object properties (transform values and camera motion). It works like most other timeline systems found in dedicated animation programs. You can watch the companion video below.
What can it do?
It should be noted that SceneForge is not an animation program--it's a 3D application with basic animation capabilities.
That being said, you can use the timeline to move objects around your scene, change lighting and playback/record camera motion/properties.
Timeline UI

The timeline is broken up into four sections:
Tables can't be imported directly. Please insert an image of your table which can be found here.
The Playback Bar
If you're familiar withThe Playback Bar timelines in video editing programs, this should be pretty simple.
Here you can see the current timestamp, play/pause the timeline, jump to the beginning or end of the timeline, and scrub through the timeline by dragging the play head.

The Layers Panel
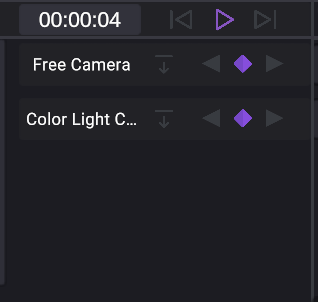
Here you can see a list of all the currently active timeline layers.
These can be added by either recording camera motion or by pressing the "Timeline Animation" button on the selected object's properties menu.
Layers can have a few different types of track:
Tables can't be imported directly. Please insert an image of your table which can be found here.
Depending on what type of object is selected, its linked layer can be expanded to reveal more properties with the expand button.
To delete a layer, select it, then press the delete/backspace key.
Each of these types are explained in detail in later sections of this page.
The Timeline Area
Here is where you actually manipulate the clips and keyframes and scrub through the scene's timeline.
When scrubbing through (dragging the play head left and right), objects with linked transform tracks will move according to any keyframes on the track.
TIP: Keep this in mind when moving objects in your scene. If you move an object that has transform keyframes, the object will jump to the recorded positions when the play head is moved. Clips and Parameters do not respond to scrubbing.
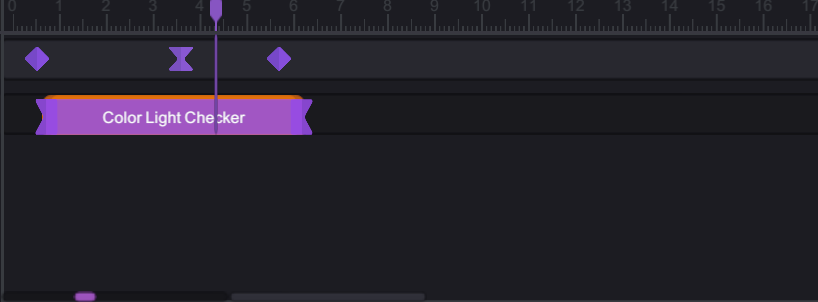
Manipulating Keyframes
To add a keyframe, press the purple diamond button on the track. This will record the linked object's current transform values into a keyframe.
To move around keyframes and adjust the timing, click and drag them left and right.
To delete a keyframe, click on it to select, then press the delete/backspace key.
You can also select multiple keyframes at once by either manually ctrl+clicking on them, or clicking and dragging a selection box.
Keyframes can also have easing set on them. To change the ease type (linear by default), right-click on the keyframe and use the context menu.

Manipulating Clips
Clips can be moved around by dragging them left and right.
They can be resized by dragging the ends.
To reset a clip to its original duration, press the "Undo" button on its associated layers panel.

Parameter Tracks
Parameter tracks allow you to animate properties of different objects such as lights and cameras.
Parameter tracks are children of the main layer and can be shown/hidden by clicking on the expand button.
These parameters can be animated and adjusted using keyframes.
Different object types have different parameter tracks. For example, a camera has the track shown below, while lights allow changing of temperature and intensity.

Timeline Options
There are three main options for the scene's timeline.
Tables can't be imported directly. Please insert an image of your table which can be found here.
Was this article helpful?
That’s Great!
Thank you for your feedback
Sorry! We couldn't be helpful
Thank you for your feedback
Let us know how can we improve this article!
Feedback sent
We appreciate your effort and will try to fix the article
X