
No recent searches
Popular Articles

Sorry! nothing found for
SceneForge Basics --> Stage Mode
Modified on Fri, May 10, 2024 at 3:58 PM
Stage Mode

Judah Mantell
Last Update 2 years ago
The stage mode is where you will be editing all aspects of your scene. This includes the visuals, object placement, lights, cameras, and VFX. You can watch the companion video below.
Stage Mode UI Overview
The Stage mode is made up of four main sections.

Tables can't be imported directly. Please insert an image of your table which can be found here.
Navigating the 3D View
As mentioned, in the center of the UI is a large 3D window into your scene. To navigate around it, hold the right mouse button and move your mouse around to 'look'.
To move through 3D space use the W, A, S, D keys while holding down the right mouse button. This allows you to "fly" through the scene.
You can also use the middle mouse button to "pan" the camera up, down, left, and right.
If an object is selected, press F to focus the editor camera on the object.
Manipulating 3D Objects
To select an object, simply click on it.
After selection, movement handles/gizmos will appear at the object's center. You can click and drag them to move, rotate, and resize (scale) the object.
Selecting an object makes its properties panel visible on the right. You can use that to change different properties of the object.
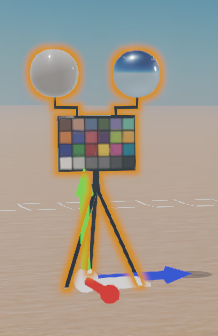
Transform Controls

You can switch between the transform mode by clicking on the little floating buttons in the top right.
When in movement mode, to move in all directions on the X and Z axis, click and drag the flat plane in the center of the movement gizmo. Objects move and scale in units of Meters.
Using the Global/Local toggle, you can change the direction that the movement gizmo is facing: Along the world's axis, or the object's local axis.
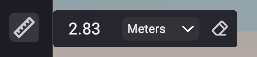
To snap to a set grid (see below), hold CTRL while dragging one of the axis.
You can also hold shift to select multiple objects at once and control them.
Use Ctrl/Cmd + Z/Y to undo and redo object transformations (movement, rotation, scale).
And, use Ctrl/Cmd + D to duplicate the selected object.
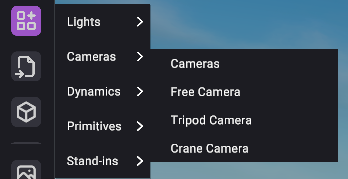
The Left Toolbar
This menu has a bunch of options that can be used to control your scene, add objects, and change the look of your scene.
Many of these options are described in their own section.

Tables can't be imported directly. Please insert an image of your table which can be found here.
Tables can't be imported directly. Please insert an image of your table which can be found here.
Tables can't be imported directly. Please insert an image of your table which can be found here.
Tables can't be imported directly. Please insert an image of your table which can be found here.
Object Properties
The properties panel is where info will be displayed about the selected object.
Depending on the type of object that is selected, the info displayed here will vary. All objects will have the transform info at the top (position, rotation, and scale values).
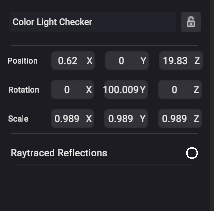
At the top is a field for changing the display name of the object, and a lock to prevent selecting the object in the scene view.
Below are transform values, and beneath that are all options specific to the type of object selected.
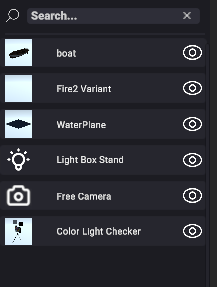
Hierarchy Panel
The hierarchy panel is very simply a list of all the objects that have been added to the scene. You can click one of these buttons to auto-select the object in the scene.
Was this article helpful?
That’s Great!
Thank you for your feedback
Sorry! We couldn't be helpful
Thank you for your feedback
Let us know how can we improve this article! *
Feedback sent
We appreciate your effort and will try to fix the article
X