
No recent searches
Popular Articles

Sorry! nothing found for
SceneForge Basics --> Shoot Mode
Modified on Fri, May 10, 2024 at 3:58 PM
Shoot Mode

Judah Mantell
Last Update 2 years ago
The Shoot mode is where you will be actively controlling cameras, recording camera movement, and setting up physical camera tracking.
Shoot Mode UI Overview
The Shoot mode is made up of three sections:
Tables can't be imported directly. Please insert an image of your table which can be found here.
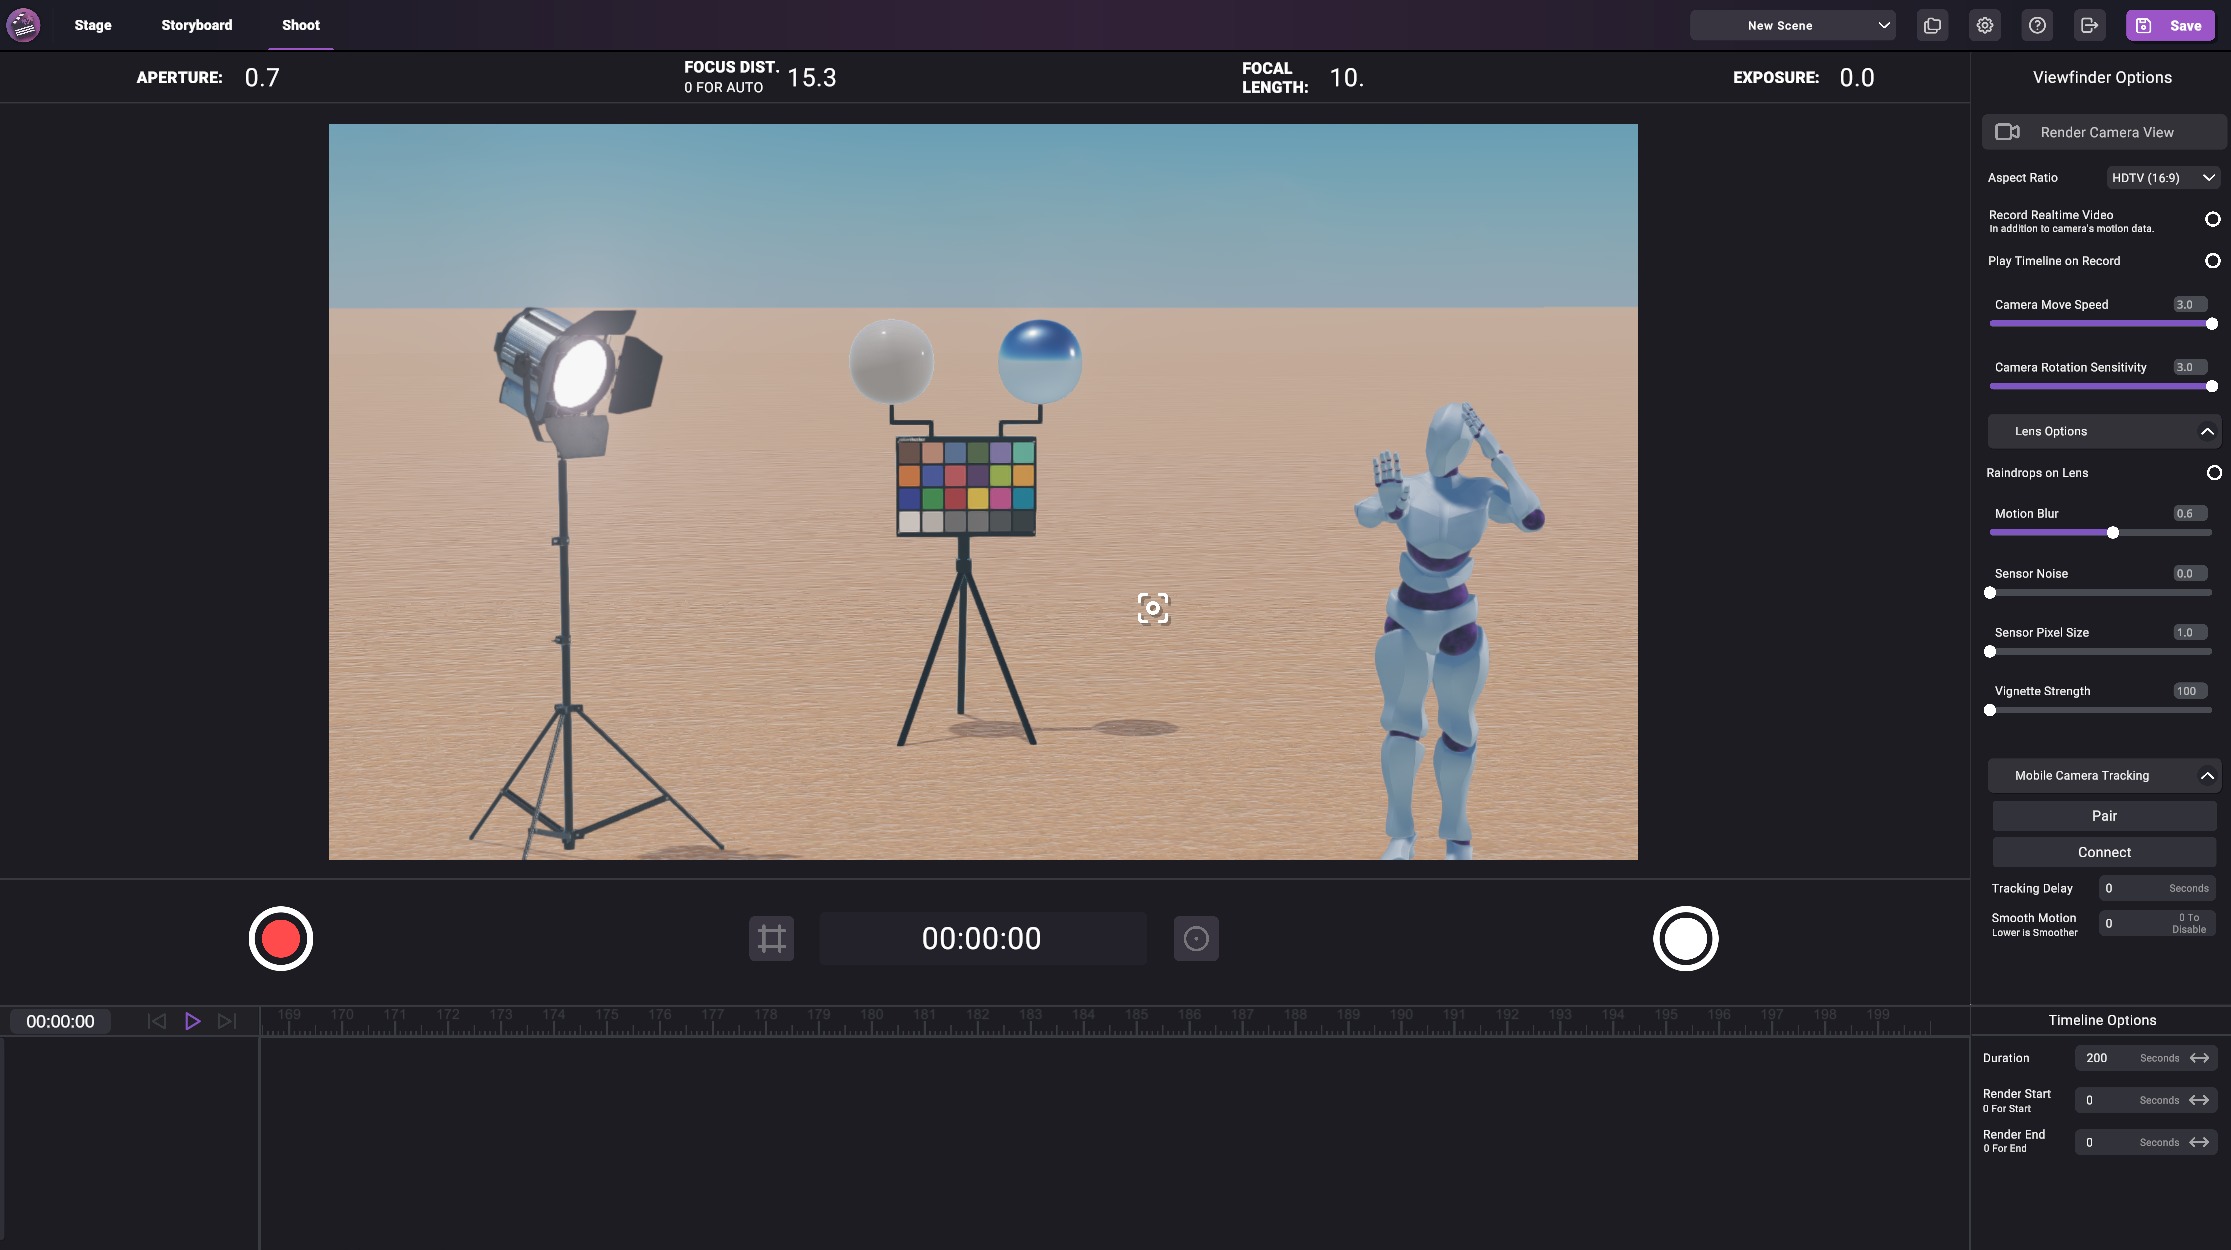
The Viewfinder
This viewport shows what the currently active camera is seeing. This and all other viewfinders shown in the editor are displayed in 1080p. The resolution can be changed when exporting content.
To learn more about how SceneForge Studio uses cameras, see the cameras page.
Viewfinder Camera Controls
To rotate/face the active camera, left click and drag inside the camera's viewport. This will allow the camera to "look" around in your scene.
You can also use the W, A, S, D while holding the left mouse button to move the camera forward, back, left, or right.
You can also press F on the Keyboard to toggle full screen camera view mode.
Changing Camera Properties
To change the values shown at the top of the viewfinder, hover your mouse over them and adjust the mouse scroll wheel. These properties are explained in detail on the cameras page.

To set the focus distance automatically, right-click somewhere in the viewfinder. This will ensure that the clicked-on object is in focus.
The focus will be broken when the camera moves, as it just sets the focus distance.
It replicates the "tap-to-focus" feature found on smartphones and modern cameras.
To lock focus so that the clicked object stays in focus regardless of motion, hold shift when right-clicking on the object.
Capturing Content
To take a snapshot of the viewfinder left click the white circle button in the bottom left. This will capture an image of the camera's view in 1080p (the resolution of the editor viewfinders), and store all of the camera's info as a Shot. Shots can be used to compile storyboards in the Storyboard Mode
To start/stop recording left click on the red record button. This will record the camera's motion to the timeline.
You also have the option to record video in real time in 1080p, though this is not recommended for performance reasons. To learn more about recording, see the Cameras and Recording page.

You can also toggle a "rule-of-thirds" grid, and toggle Focus Debug Mode.
That will display your scene in black and white, with white meaning out of focus, and black meaning in focus. You can also temporarilyu use this mode by holding down the tilde key (~).
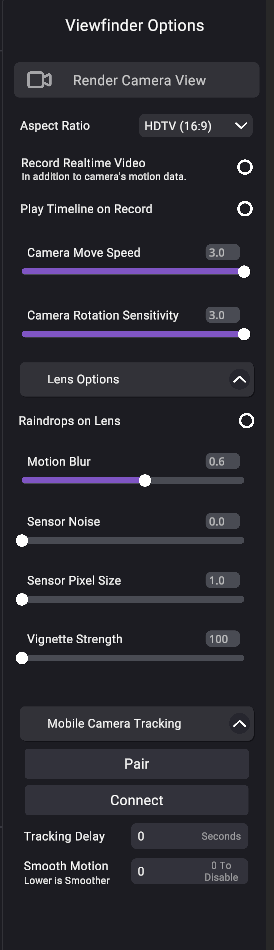
Viewfinder Options
This section is where you can set video settings such as resolution, aspect ratio, and framerate, as well as playback settings.
Tables can't be imported directly. Please insert an image of your table which can be found here.
Was this article helpful?
That’s Great!
Thank you for your feedback
Sorry! We couldn't be helpful
Thank you for your feedback
Let us know how can we improve this article!
Feedback sent
We appreciate your effort and will try to fix the article
X