
No recent searches
Popular Articles

Sorry! nothing found for
SceneForge Basics --> Node Editing
Modified on Fri, May 10, 2024 at 3:58 PM
Node Editing
A new way to edit complex data and create effects.

Judah Mantell
Last Update 2 years ago
The Node Editor
This editor is currently used for editing VFX Elements, but in the future its functionality can be opened up to other things like animation logic and compositing.
Using the Editor
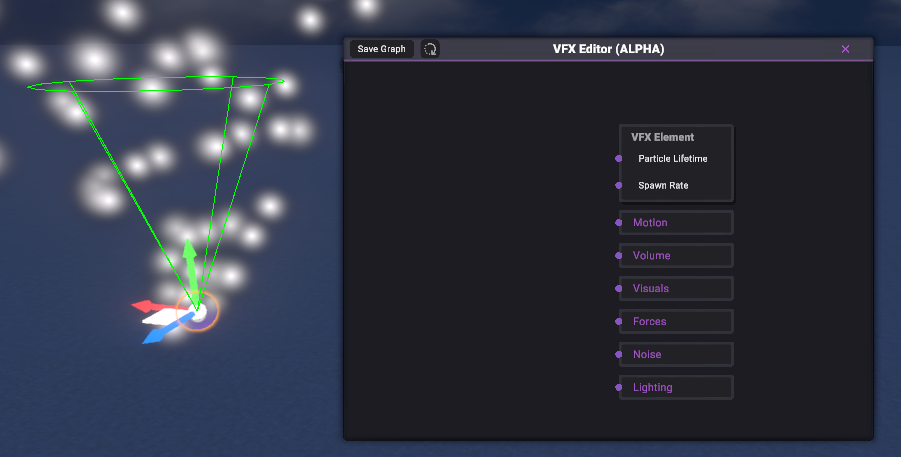
This editor is a Node Based Editor, which allows for more customization and logic than a traditional list of UI controls. Each editor has a Master Node (Shown above) which is the end-destination of all data for the graph. In this example, a VFX Element is being edited.
Nodes can be moved around by clicking and dragging their titlebar. Or deleted, duplicated, or cleared by right-clicking on them.
To move around the editor, use the scroll wheel to zoom in and out, and click and drag with the Right or Middle Mouse Button to pan around the graph.
You can plug different nodes into sockets of the master node depending on what you want to control.
Different nodes contain and control different types of data as explained below.
Nodes can be added either by right-clicking on the graph or pressing Tab on your keyboard to open the Node Menu.
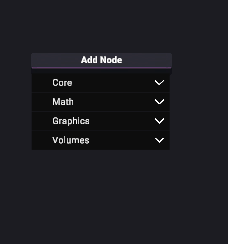
This menu can be toggled with the Tab Button and moved around by clicking and dragging the title bar, as with any other window.
This menu is broken up into different categories of nodes.
These categories will differ depending on what the editor is being used for.
Here are a few examples of nodes in the Math Category which is available for all editors.
Tables can't be imported directly. Please insert an image of your table which can be found here.
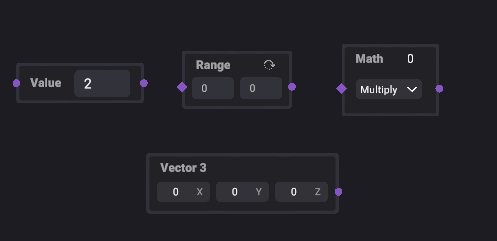
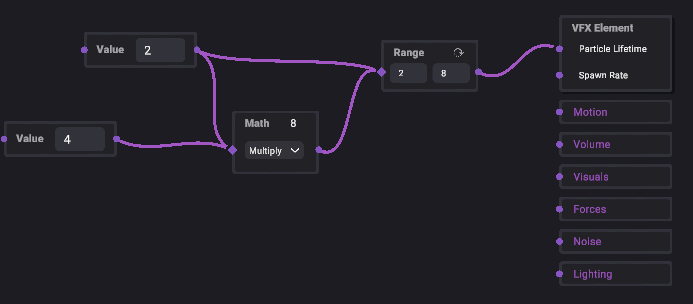
As you can see, almost all nodes have an input of some type and output of some type. Different inputs can accept different outputs, and do different tasks with that data.
To connect nodes, click and drag an output socket (on the right), and drop it onto a valid input socket. The data from the output node will flow into the input node.
This continues until it reaches the master node for processing.
Was this article helpful?
That’s Great!
Thank you for your feedback
Sorry! We couldn't be helpful
Thank you for your feedback
Let us know how can we improve this article!
Feedback sent
We appreciate your effort and will try to fix the article
X